
If you’re willing to head into a dark cave and wade through ankle-deep water for a short distance, a visit to Waipu Cave in New Zealand will allow you to experience a glorious Milky Way of tiny blue lights made by hundreds of glow worms while also giving spelunking a try. It’s currently free to experience and definitely one of the most memorable things we did on our North Island road trip. Even young kids can go!
You’ve probably heard of the glow worm caves in Waitomo, and I’m sure they’re beautiful – if you’re not interested in getting your feet wet or you’d just feel more comfortable with a guide, you can go on a boat tour of the Waitomo Caves from about $55 NZD per person. We ended up skipping Waitomo because we did the Waipu Cave as well as a guided walking tour through the Kawiti Glow Worm Cave (more on that later) and didn’t feel we needed to experience a third cave.
Whichever cave you decide on, please do try and get to one of them to see the glow worms as they are truly a spectacular natural phenomenon! You can’t capture how epic it is on an iPhone camera so you’ll just have to trust us in this one.
Getting to Waipu Caves
You’ll need a vehicle of some sort to drive to Waipu Cave since, as far as I know, there are no tours that will take you there. The cave is about a 2 hour drive north of Auckland, and you can simply search for Waipu Cave on Google maps and it’ll take you right there.
When you arrive, you’ll find a parking area (side note: you’re allowed to park your camper van here overnight) with a small building containing toilets. There’s also a shower on the outside wall so you can wash your feet off afterward. Park your car and look across the field to find the small sign marking the start of the trail down to the cave entrance (it’s off to the right as you’re driving into the parking lot, but if you can’t see it, just ask someone else and they’ll probably be able to point you in the right direction).
What to bring
Here are a few things it might be useful to bring with you:
- Flashlight/torch – this one is crucial. You need some kind of light to guide you through the cave. Your phone’s flashlight will do the trick but it’s nice to have something that you won’t be so upset over if it gets dropped in the stream!
- Water shoes – having something on your feet makes the experience more comfortable. We saw other people in rubber boots/gumboots and flip-flops/jandals so those would work too. Some people did go in bare feet though, so you can if you want to!
- Swim suits/clothes you can get wet – to reach the best area, you’ll only get your feet wet. But if you’d like to head further into the cave, you might get your bottom half wet. If you’re interested in going as deep as you can into the cave, you’ll want to be wearing something you can get wet!
- A towel – having a towel in a backpack or at least in your car will be helpful for drying off afterward.
That’s it! Spelunking in Waipu Cave isn’t too complicated and most people can do it with minimal planning.
What to expect
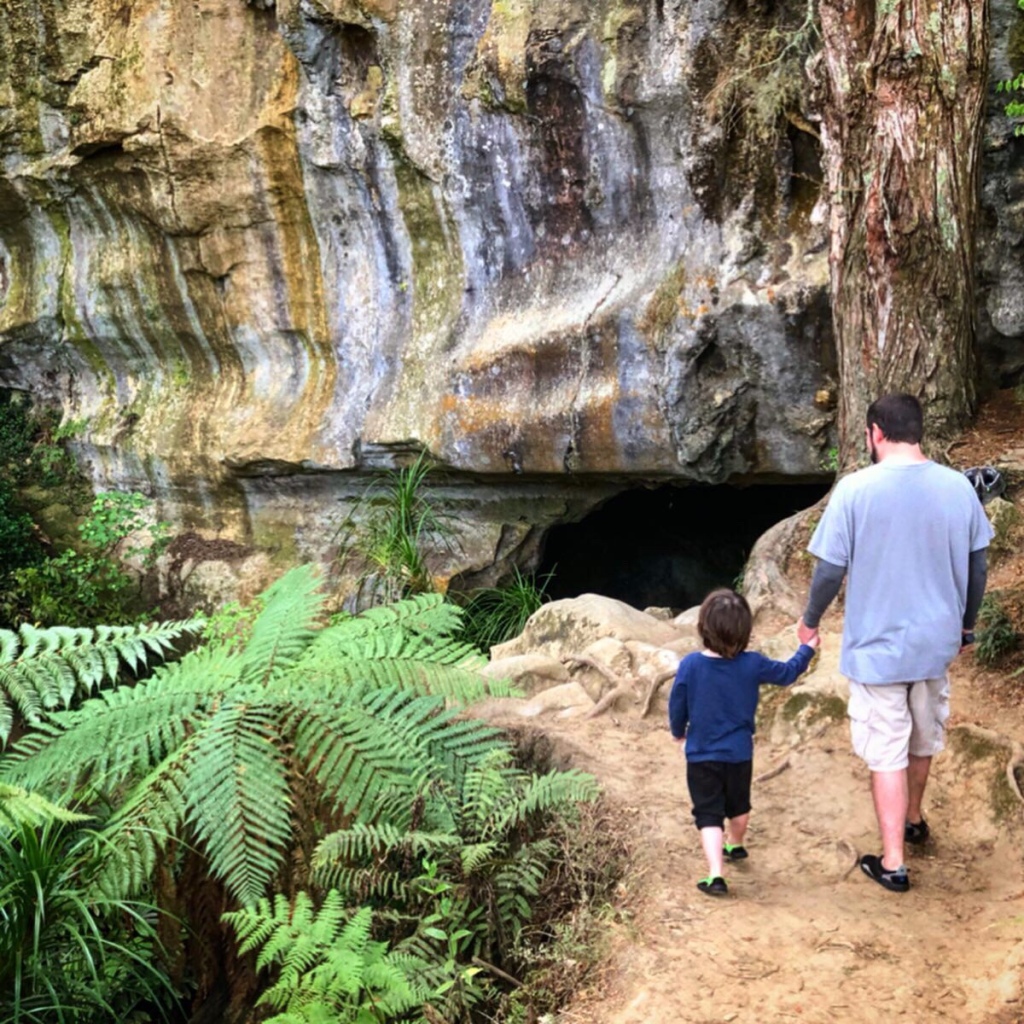
The trail to the entrance of the cave is a short one, so it only takes a few minutes to reach the opening. There are a few rocks and roots sticking out and on one side is a fairly steep slope so take care and keep the little ones close.
Once you reach the entrance, head in as far as you can without crossing the stream. Keep your lights off (there will be some light coming in from the entrance) and wait several minutes for your eyes to adjust to the darkness. When you’re ready, head to the left (based on the direction you’re facing when you first walk in) across the stream. There are rocks to step on, but the water is only ankle-deep so you can just walk right through it as well.

Keep following the stream. You’ll need your flashlight to make sure you’re not going to trip on a rock or something, but within a few feet, you should start to see a few tiny blue lights on the top of the cave. Those are the glow worms! Keep going, and you’ll eventually reach a larger area with a high ceiling. You’ll know you’re there because on the other side, the ceiling gets low enough that you’ll have to duck to keep going. Stop here and turn off your lights to behold the starry majesty above you!

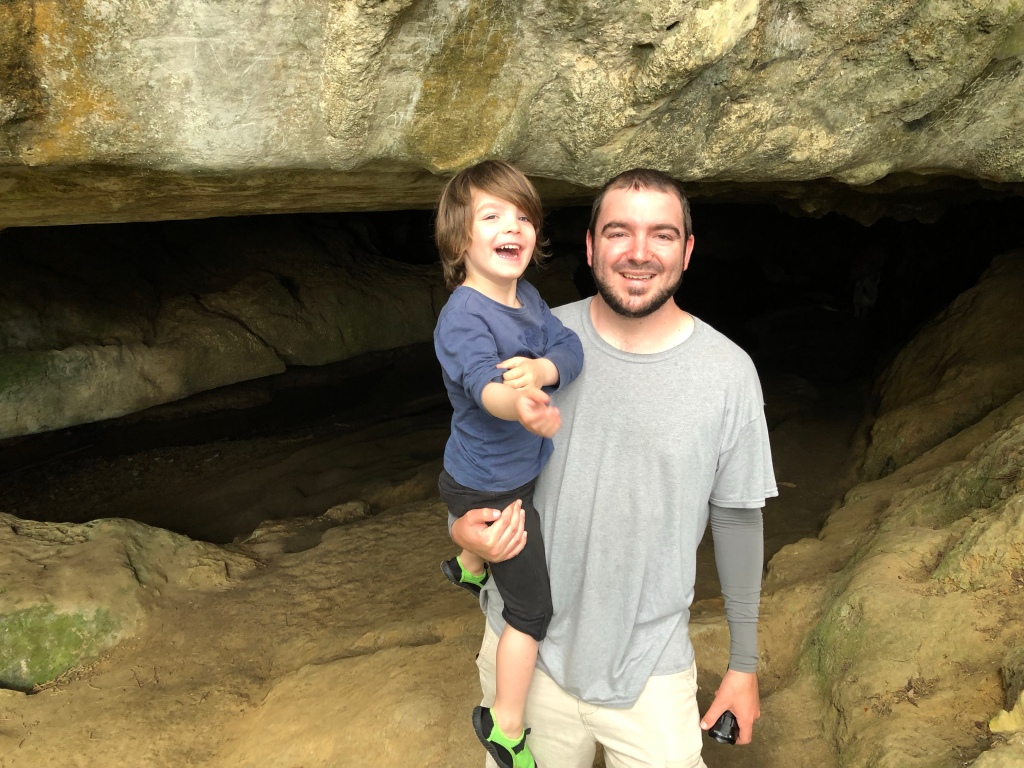
If you’re feeling adventurous, you can continue in deeper into the cave. You’ll have to duck down and wade through shallow water (no more than a foot or two deep – 3-year-old Phoenix did it so you know it can’t be that bad!) but you can keep going a bit further. I was not keen to go any farther so I stayed where I was and admired the incredible number of glow worms above me for a bit more time.

Some important points
- Avoid touching or damaging the stalactites and stalagmites (rock formations) as doing so interferes with their development.
- Leave nothing behind.
- We’d heard that noise and light will cause the glow worms to stop glowing but that’s not the case. That said, make sure you don’t touch them as they are living creatures that deserve to be respected and protected.
- You can’t got lost in the cave – it’s straight in and straight back out. Plus there will almost surely be other people around to help you out if you need it.

If you have kids
Kids can definitely visit Waipu Cave safely and have a great experience. Phoenix was 3 when we visited and he did just fine, and younger kids would likely be okay too although I’d recommend putting smaller kids into a carrier of some sort.
You’ll need to hold younger kids’ hands both on the trail leading to the cave as well as during the walk through the cave itself since the ground can be quite uneven and slippery and there are a couple of spots where they will need to step up onto rocks.
We recommend bringing a cheap flashlight for younger kids to carry – they often feel safer and more confident when they have their own light, but you also don’t want to risk them dropping an expensive light source like your phone!
What are glow worms anyway?
Glow worms hang in little “hammocks” from the ceilings of caves. They create “threads” with their saliva that hang down in the hope of catching flies or mosquitoes and their blue light is an attempt to attract the bugs to their threads. The brighter the light, they hungrier the worm! The worms with dimmer lights probably had a meal the day before. They stay in the glow worm stage for 11 months before creating a cocoon and then emerging as a fly.

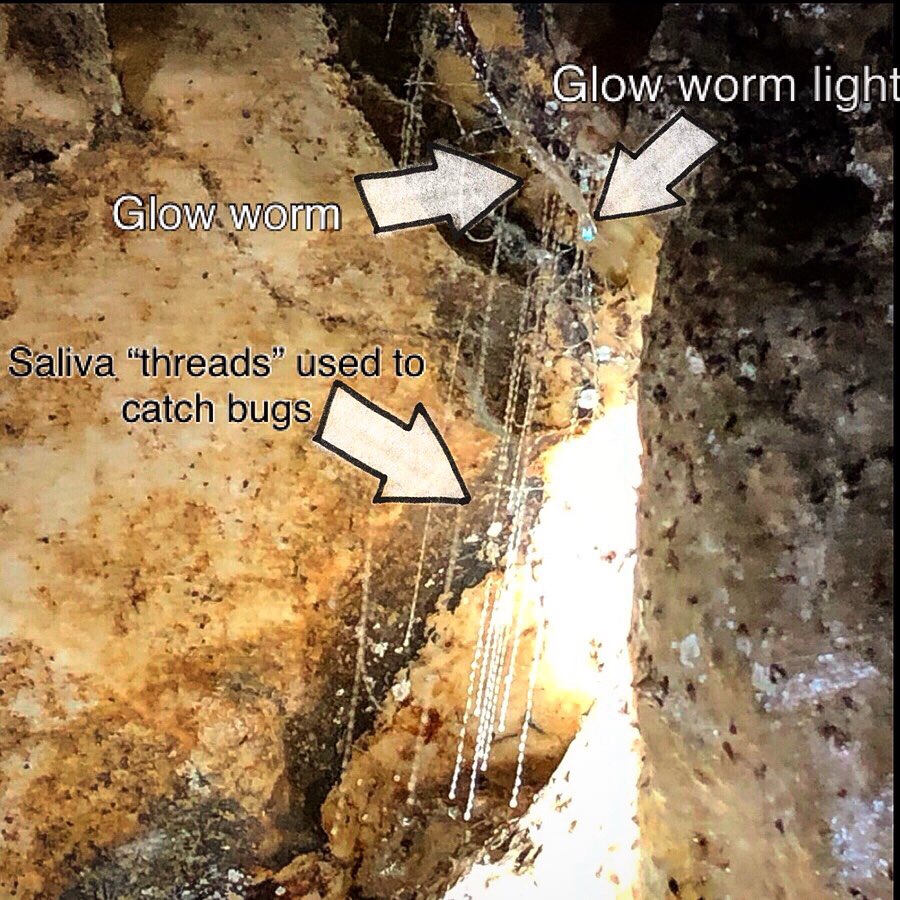
You’ll notice that the little blue lights of the glow worms are pretty evenly spaced out and that’s because they are not fond of each other – if one worm gets in the way of another worm, they will fight and the loser gets eaten. Yes, they are cannibals!


Kawiti Glow Worm Cave
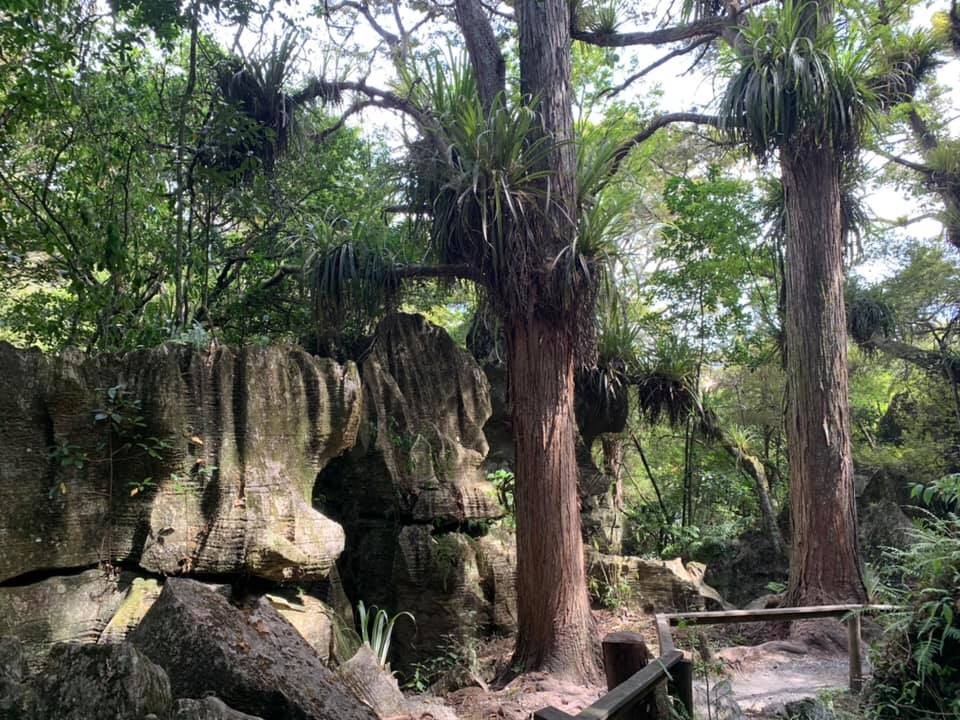
Our first experience with a glow worm cave was actually the Kawiti Cave, which we happened to see on the map when we were in the area. That cave is commercialized so they run official tours and have built a walkway through the cave. It costs $20 NZD per adult (kids under 5 are free) and the tour guide will provide a lantern as well as some interesting commentary as they take you through the cave. You can’t take photos inside the cave. Also be aware that if you wish to go all the way through the cave and then on the bush walk back to the entrance (which is beautiful – see the photo below), you will have to go up quite a few stairs and along a very uneven path. However, you also have the option of just going back through the cave the way you came, which is not too onerous. The glow worms are beautiful and we enjoyed the tour, although if we had to choose, we preferred spelunking into Waipu Cave ourselves.

Have you ever gone spelunking? Have you seen glow worms? What other tips would you pass on?
Connect with us!
- Our Email: parentsonaplane@outlook.com
- Our Instagram: @parentsonaplane
- Our Twitter: @parentsonaplane
